
Safety First: A Field-Tested Checklist for Solo Inspectors in Vacant Properties

· 7 min read
Richard Thaler
Richard Thaler
Marketing Manager

Vacant homes can feel like low-stakes environments—no sellers underfoot, no protective pets, no furniture to navigate. But this illusion of calm hides some of the riskiest conditions an inspector will face: unsecured entry points, inactive or tampered-with utilities, squatters, and latent structural or environmental hazards.

Because solo inspectors lack the built-in safety net of a partner, every visit to a vacant property must follow a rigorous, non-negotiable routine. This field-tested framework is built on three pillars: Personal Protective Equipment (PPE), consistent communication, and a systematic hazard assessment.

2025-07-18-a-field-tested-checklist-for-solo-inspectors-in-vacant-properties


1. Suit-Up: Personal Protective Equipment (PPE)

A basic home inspection kit already covers most risk scenarios, but only if you use it consistently and upgrade a few key items specifically for the unknowns of a vacant property.

Head & Eyes

  • Bump Cap or Hard Hat: Wear an ANSI-rated hard hat or a simple bump cap. It’s essential for navigating low-clearance attics, crawlspaces, and porch overhangs where you can’t see every hazard. (InspectorPro Insurance)
  • Safety Glasses & Goggles: Start with clear safety glasses for general protection. Be ready to switch to fully sealed goggles if you encounter signs of mold, bat droppings (guano), or disturbed, blowing insulation.

Respiratory

  • Half-Face P100 Respirator: A simple dust mask is not enough. For properties with potential mold, rodent debris, or asbestos-containing materials (like vermiculite insulation or "popcorn" ceilings), a half-face elastomeric respirator with replaceable P100 cartridges is the minimum standard for protecting your lungs.

Hands & Knees

  • Cut-Resistant Gloves: Vacant properties often have rusted electrical panels, broken glass, or sharp-edged debris in crawlspaces. A good pair of cut-resistant gloves is critical. (National Association of Home Inspectors)
  • Foam Knee Pads: Protect your knees from nail punctures, hidden screws, and shattered glass when inspecting floors and crawlspaces.

Feet

  • Composite-Toe Boots: Leave the sneakers in the truck. Wet basements, broken glass on floors, and loose, nail-studded boards make ASTM F2413-compliant composite-toe boots with a slip-resistant sole an absolute necessity.

Essentials Pouch

  • Light Sources: Carry a primary flashlight and a backup headlamp. You can’t inspect what you can’t see, and you can't assume utilities will be on.
  • Voltage Tester: Always have a non-contact voltage tester clipped to your shirt or in a pouch for immediate access before touching any electrical component.
  • Personal Supplies: Carry a 24 oz. bottle of water to stay hydrated and a basic first-aid kit for minor cuts and scrapes.

Pro Tip: Before you begin, take a quick photo of yourself on-site wearing your PPE. In the event a liability claim ever arises, this photo helps document your professional due diligence.


2. Lone-Worker Check-Ins

The Occupational Safety and Health Administration (OSHA) requires employers to have a system to account for employees working in "isolated locations." As an independent inspector, you are your own safety manager. Mirroring this standard is a crucial part of professional practice.

  • Pre-Arrival: Before you leave for the site, text a designated safety partner (a spouse, colleague, or friend) your complete itinerary. Include the property address, any gate codes, and your expected wrap-up time.
  • Automated Apps: Use a dedicated lone-worker safety app. Services like SafetyLine or OK Alone use your phone's GPS and an internal timer to monitor your status. They can provide GPS breadcrumbs to emergency services and trigger "man-down" alerts if the phone detects a sudden fall.
  • Checkpoint Schedule: Set a check-in timer. By default, check in every 60 minutes. Shorten this to every 15 minutes when you enter a confined space like a crawlspace or attic, or when utilities are off and you are operating in low light.
  • Fail-Safe Protocol: The system’s most important feature is escalation. If you miss a check-in, the app automatically notifies your emergency contact, who can then call 911 with your last known GPS ping.

Here’s a simple script to set expectations with clients or agents:

“Because I’ll be on-site alone, I follow OSHA lone-worker best practices with timed check-ins and GPS monitoring for my safety. You may see my phone buzz during the inspection—it’s part of my standard safety procedure.”


3. On-Site Hazard Assessment Flow

Develop a routine and follow the same three-phase scan on every visit—before entry, during the inspection, and before you leave.

Curb-Side Scan (2 minutes)

  • From your vehicle, look for broken windows, pried-open doors, or fresh graffiti—all signs that squatters may be inside.
  • Note overgrown vegetation, hoses, or areas of standing water that could conceal trip hazards as you approach the home.

Threshold Scan (5 minutes)

  • Before entering, knock loudly and announce yourself: “Inspector entering! Is anyone here?” Wait a moment.
  • Hold the door open and sweep the immediate entry area with your flashlight. This gives any rodents—or people—a chance to flee.

Interior Walk-Down

  • As you enter, take a moment to sniff for the smell of natural gas, chemical solvents, or decay. If you feel light-headed or smell gas, leave immediately and call the utility company.
  • Test the stability of every staircase and attic pull-down ladder before committing your full weight.
  • Use your non-contact voltage tester to verify that the electrical panel cover is de-energized before you touch and remove it. Lock it out if possible.

Hidden Spaces

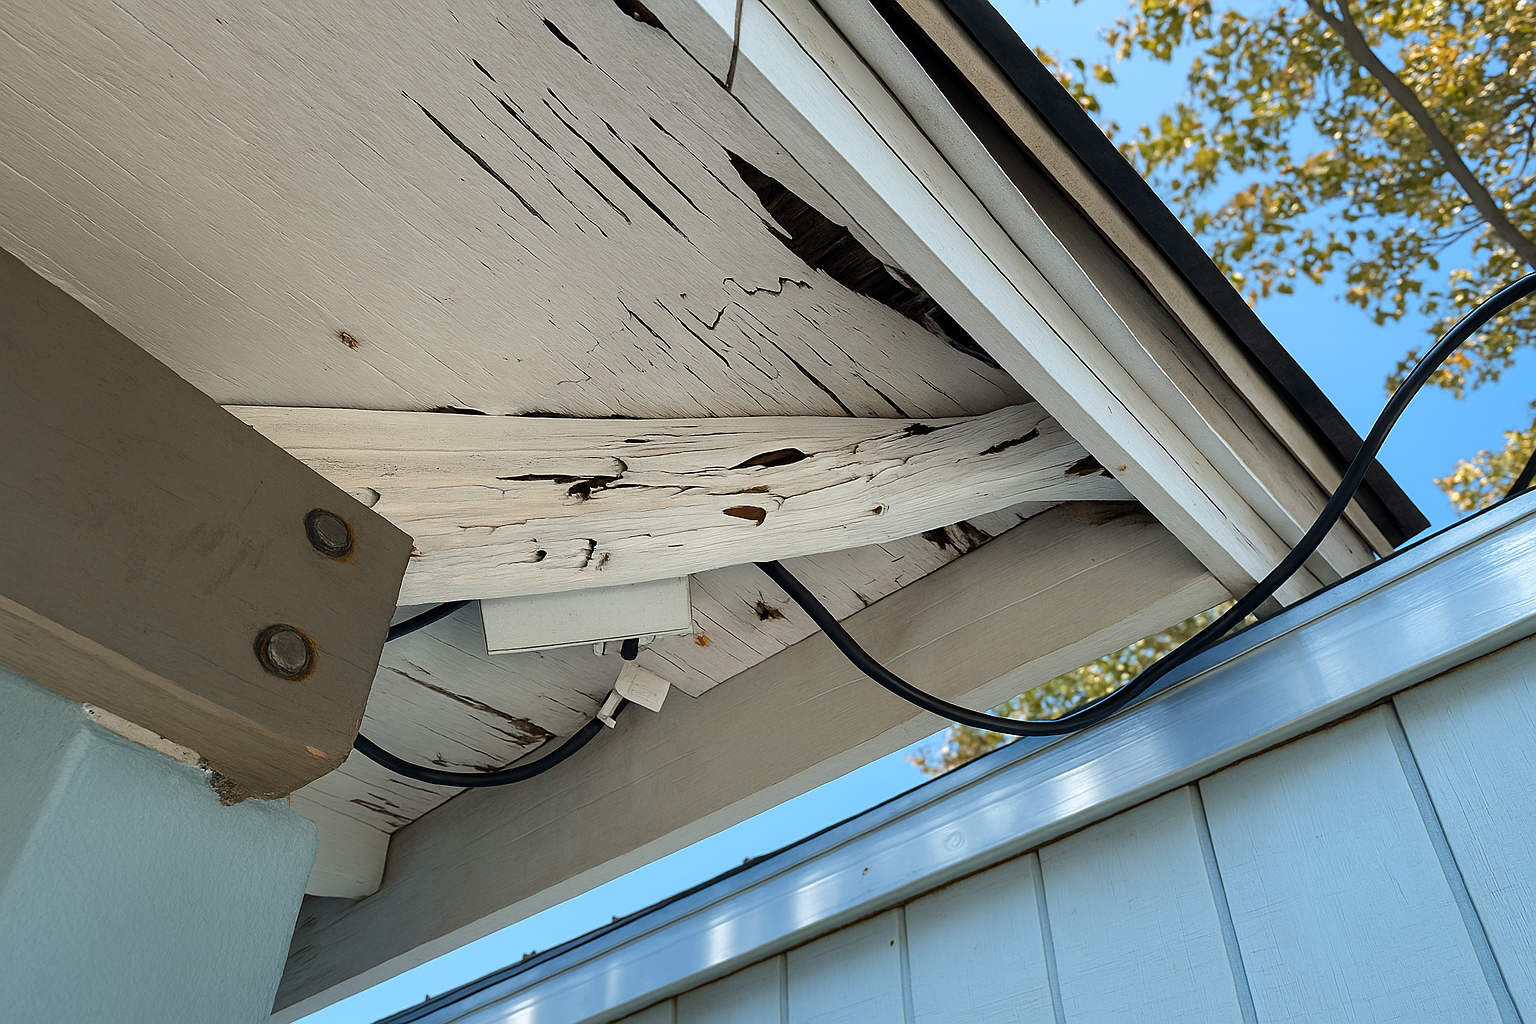
  • Crawlspace: Tap floor joists with a screwdriver or awl. Wet or rotted wood will make a dull thud instead of a sharp rap.
  • Attic: Probe insulation to check the depth, but always watch where you step. Assume all decking is unstable and stay on the framing members. A single misstep can send you through the ceiling drywall.

Exit Sweep

  • Before leaving, do a final walkthrough. Confirm gas and water are off (if they were off on arrival) and that the electrical panel cover is securely replaced.
  • Check your pockets to ensure you haven't accidentally taken property keys or left any tools behind.
  • Once you are safely back in your vehicle, send your "inspection complete" check-in to your safety partner or app.

As OSHA’s hazard-identification model recommends, safety isn't a one-time checklist at the door; it's a process of continual reassessment throughout the entire inspection.


4. Printable Quick-Check Card

To build the habit, create a simple reference card.

VACANT PROPERTY SAFETY CHECKLIST

  • PPE on (Head, Eyes, Respirator, Gloves, Boots)
  • Itinerary texted to safety partner
  • Lone-worker app running & phone battery ≥ 50%
  • Exterior curb-side scan completed
  • Loud entry announcement made
  • Utilities status verified (Gas, Electric, Water)
  • Confined-space timer set (if applicable)
  • Final exit sweep & "home safe" text sent

Download: Copy and paste this list into a document, print it on a 3×5″ card, laminate it, and clip it to your tool bag.


5. Reduce Liability with Documentation

Your safety protocols are also a powerful liability shield.

  • Pre-Inspection Agreement: Include a “Vacant Property Safety” paragraph in your agreement. Note that utilities may be off, conditions are uncontrolled, and some systems may not be testable.
  • Photo Documentation: Photograph all locked doors or windows after you replace them to create a visual record that you re-secured the premises.
  • Keep Records: Keep digital copies of your PPE receipts and safety app subscription invoices. They prove you have invested in and maintained a proactive safety program, which can be invaluable if you are ever sued.

6. Next Steps for Tenspect Users

Your commitment to safety is a mark of professionalism. Leverage your Tenspect software to highlight it.

  • Embed the Checklist: Embed a version of the printable checklist into your Tenspect report template so agents and clients can see your professional process.
  • Automate Check-ins: Use Tenspect’s scheduling reminders to automatically text your safety partner the moment you click “Start Inspection” on-site.
  • Talk to Your Insurer: Share this article and your documented safety protocols with your insurance agent. Some carriers offer premium discounts for inspectors with verified lone-worker systems in place.

Solo doesn’t have to mean unsafe. With the right gear, a disciplined check-in routine, and a practiced hazard scan, you’ll finish every vacant-property inspection confident, compliant, and claim-free.

Hidden in Plain Sight: Ten Common Defects New Inspectors Miss—& How to Catch Them

· 8 min read
Richard Thaler
Richard Thaler
Marketing Manager

New inspectors rarely lack enthusiasm; they lack a trained eye that comes from years of experience. Some of the costliest home defects aren’t loud and obvious—they’re silent sleepers that routinely slip through first-year reports.

Use this field guide to sharpen your diagnostics. We’ve compiled ten "sleeper" issues, complete with quick-spot tips and real-world anecdotes, to help you protect your clients, build your reputation, and boost confidence from day one.

index


1. Double-Tapped Circuit Breakers

Double-Tapped Circuit Breakers

(As seen in Image 1)

  • Why it hides: In a crowded electrical panel, a double-tapped breaker—where two conductors are connected to a terminal designed for one—can easily masquerade as a factory-installed twin-lug breaker.
  • Catch it fast: After confirming the panel is safe to touch, run a knuckle gently along the row of breaker lugs. If you feel two conductors moving as a single unit under one screw, zoom in for a clear photo. According to data from inspection industry leaders like Structure Tech Home Inspections, this is one of the most frequently cited electrical defects.
  • Field Story: Rookie inspector “Sam” missed a double-tap on a flipped condo. Four months after closing, a loose neutral wire overheated, scorching the panel. The emergency repair cost the new owner 2,200aproblemthatcouldhavebeenidentifiedandfixedwithabout2,200—a problem that could have been identified and fixed with about 5 in wire nuts on inspection day.

2. Missing Kick-Out or Step-Flashing

B.png

(Damage from this is visible in Image 3)

  • Why it hides: Flashing is a thin strip of metal, often painted to match the trim and tucked behind siding. Without obvious water stains on a dry day, it’s virtually invisible from the ground.
  • Catch it fast: At any point where a roofline meets a vertical wall, use a small mirror or your smartphone’s selfie camera to peek behind the edge of the siding. Look for a continuous piece of metal flashing. From inside the attic, scan these same junction points for any gaps of daylight. As noted by experts on the InterNACHI®️ Forum and at firms like Trinity Commercial Roofing, missing flashing is a top driver of expensive rot repairs.
  • Field Story: A first-time buyer called their inspector six months after moving in, concerned about peeling paint above their patio door. The inspector returned and got a moisture meter reading of 24% behind the drywall—a direct result of missing kick-out flashing where the patio roof met the wall.

3. Negative Grading at the Foundation

  • Why it hides: A gentle slope toward the house is easily disguised by thick grass, fresh mulch, or landscaping, especially on smaller urban or suburban lots.
  • Catch it fast: Don’t trust your eyes; trust your tools. Lay a 24-inch level on the soil, pointing away from the foundation. Even a half-inch of fall toward the structure over that two-foot distance equals a 2% negative grade, channeling water directly to the foundation.
  • Why it Matters: According to insurance claim data analyzed by axiomhomeinspection.com, poor grading is one of the most common and costly conditions leading to claims for water intrusion and foundation damage.
  • Field Story: Inspector “Lena” noted a minor negative grade in her report. Two weeks after her clients moved in, a heavy summer storm flooded the crawlspace. Her note, which recommended simple regrading, saved the client an estimated $8,000 in emergency pump-out services and mold remediation.

4. Ceiling Moisture Invisible to the Eye

Ceiling Moisture Invisible to the Eye

(As seen in Image 2)

  • Why it hides: A small roof or plumbing leak can seep into the ceiling drywall and then dry out between rainfalls or before a showing, leaving no visible stain.
  • Catch it fast: This is where technology gives you an edge. Sweep all ceilings, especially under bathrooms and in closets, with an entry-level thermal camera (many reliable models cost less than $450). Cool, violet-colored halos or blotches often indicate evaporative cooling from hidden moisture. Verify any anomalies with a pin-probe moisture meter. As noted by HomeGauge, an IR camera is exceptional at finding wet spots the naked eye misses.
  • Field Story: A quick thermal scan revealed a faint violet blotch on the ceiling above a shower. The cause was a cracked plumbing vent boot on the roof—a simple $120 repair that prevented a future ceiling collapse.

5. GFCI & AFCI Protection Gaps

  • Why it hides: In older homes with remodeled kitchens or baths, it's common to find new countertops and fixtures paired with vintage wiring. An outlet may look modern, but it might not have the required GFCI (Ground Fault Circuit Interrupter) or AFCI (Arc Fault Circuit Interrupter) protection.
  • Catch it fast: Don't just look—test. Use a dedicated combo AFCI/GFCI tester on every required receptacle. Never assume that a GFCI outlet in the kitchen protects all the other outlets "downstream," as a hidden junction box could break the chain.
  • Upsell Angle: Offer a “Safety Sweep” as a report add-on. For a small fee, you can label all unprotected circuits and include a standard quote range for an electrician to make the necessary upgrades.

6. Attic Insulation Voids

  • Why it hides: Blown-in insulation settles over time, and batts are often compressed or pushed aside by cable technicians, plumbers, or HVAC contractors. In the low light of an attic, these small voids are easy to overlook.
  • Catch it fast: Use a laser measurer to quickly scan depths across the attic floor. Flag any areas that are significantly below the current local code R-value (e.g., R-49 or R-60 in colder climates) with a photo and a note on the insufficient depth.

7. Bath or Dryer Exhaust Venting into the Attic

  • Why it hides: The fan grille on the ceiling works, so the homeowner assumes it’s vented correctly. In the attic, the ductwork is often buried under mounds of insulation, concealing its termination point.
  • Catch it fast: This requires a two-step check. From the exterior, count the exhaust caps on the roof or soffits—does the number match the number of fans and dryers? Inside the attic, look for tell-tale signs: a fine layer of lint “snow” on the trusses or dark, damp-looking "islands" in the insulation where warm, moist air is being discharged.

8. Loose Toilets at the Flange

  • Why it hides: A toilet can feel sturdy, with tile grout or caulk at the base masking slight movement.
  • Catch it fast: Don't be shy. Straddle the bowl and use your legs to gently rock the toilet side-to-side and front-to-back. Any wobble, however slight, indicates a failed or compressed wax ring. This is a guaranteed path to hidden water damage and subfloor rot.

9. Polybutylene or Galvanized Supply Piping

  • Why it hides: Most of a home’s plumbing is concealed in walls. You may only get a few inches of visible pipe at the water heater, under sinks, or at the main water shut-off.
  • Catch it fast: Know what to look for. Check the service entry point in the basement or crawlspace and look up into the ceiling of utility closets. Flag any flexible, gray plastic tubing (Polybutylene, or PB) or dull, threaded, gray metal pipes (galvanized steel). Both are known for failure and should be noted for a licensed plumber’s review.

10. Hairline Foundation or Brick Step Cracks

  • Why it hides: Fresh paint is a crack’s best friend, filling in minor fissures. Foundation walls are often obscured by dense shrubbery.
  • Catch it fast: Carry a small, 2-foot folding mirror to view the foundation behind bushes and air conditioning units. When you find a crack, document it with a ruler in the photo for scale. Recommend a review by a structural engineer if any cracks are offset (one side is deeper than the other) or wider than 1/8 inch.

Quick-Reference Cheat Sheet

  • Panels: Scan for double-lugs after you’ve finished labeling breakers.
  • Flashing: Use a mirror to check behind siding at all roof-to-wall transitions.
  • Grading: Put your level on the soil, not your eyes. The ground should fall at least 6 inches within the first 10 feet away from the house.
  • Leaks: Confirm what you see. A thermal anomaly + a moisture meter reading = a confirmed leak.
  • Outlets: Always test, never guess, when it comes to GFCI/AFCI protection.

Turn Knowledge into Marketing

Your report is your best marketing tool. Fill it with clearly annotated photos of the defects you find. Clients share these detailed reports with agents and contractors, which builds a powerful referral pipeline.

Pair each defect image with a simple, plain-language solution and a typical cost range (e.g., “A licensed electrician should add a tandem breaker or pigtail the wires to correct this. Estimated cost: 200200–300”). Over time, this visual storytelling—your ability to make the invisible visible—becomes your brand.

For your next inspection, bring this checklist. When you snap a photo of a defect others might have missed, you’ll watch your client say, “Wow—no one else caught that.”

Building an Inspection Tech Stack Under $200/Month

· 5 min read
Richard Thaler
Richard Thaler
Marketing Manager

2025-07-17-building-an-inspection-tech-stack-under-200-month

A lean, effective tech stack allows first-year inspectors to project a professional image and operate efficiently without bleeding cash. But with countless apps and gadgets on the market, it’s easy to overspend.

Below, you’ll find our curated, budget-friendly picks for each essential layer of your inspection workflow—scheduling, reporting, moisture detection, and aerial roof checks. We’ll cap it off with a sample sub-$200 monthly budget that you can copy and implement today.


Scheduling & Job Management

A seamless booking process is the first impression a client has of your business. These tools make you look polished without a hefty price tag.

  • Square Appointments (Free Plan): Perfect for solo inspectors where every dollar matters. The free plan offers single-user online booking, automated SMS reminders, and on-site payment processing for $0/month. (Square)
  • Inspectify Platform: This is a marketplace model, not a subscription tool. You can accept jobs from their platform and use the built-in scheduler. There's no monthly fee; a revenue share only applies to certain add-on services you sell through them. (Inspectify.com)
  • Jobber Lite: When you're ready for more automation, Jobber's entry-level plan provides basic CRM features, quoting, and even route optimization for $47/month. (Connecteam review)

Starter Tip: Pair Square’s free booking page with a free Google Calendar. You can create color-coded views for different job types or personal appointments—no complex integrations required.


Report-Writing Software

Your report is your final product. It needs to be clear, comprehensive, and easy for clients and agents to navigate.

  • Spectora: Known for its slick, modern user interface, in-app payment collection, and automated follow-up emails. The monthly plan is $99/month. (Spectora)
  • HomeGauge ONE: This industry staple includes a cloud-based report writer and a client portal for $89/month after a 30-day free trial. (HomeGauge.com)
  • Tap Inspect: Offers great flexibility. Get the unlimited plan for 90/month,orifyourvolumeisstilllow,youcanpayasyougowithblocksofreportsthatbreakdowntoabout90/month**, or if your volume is still low, you can pay-as-you-go with blocks of reports that break down to about **7/inspection. (TapInspect.com)
  • InterNACHI® Online Report Writer: This tool is completely free for InterNACHI® members and now supports unlimited photos. While you still have your membership dues, the report-writing software itself adds $0 to your monthly SaaS bill. (InterNACHI®️ Forum)

Starter Tip: If you’re already an InterNACHI® member for the educational resources and E&O insurance discounts, using their free report writer is the fastest way to keep your monthly software spending at zero.


Field Gadgets That Won’t Bust the Bank

Smart hardware choices provide critical data without requiring a massive upfront investment.

Moisture Meters

One undiscovered leak can cost you a month’s profit in liability claims—don’t skip this tool. A non-invasive, pinless meter is fast, effective, and won't damage finished surfaces.

  • General Tools MM8 (Pinless): A reliable, non-invasive starting point for around $38.55. (Amazon)
  • Klein Tools ET140 (Pinless): Offers deeper ¾-inch scanning depth for more confidence, often on sale for $49.97. (Global Test Supply)
  • Extech MO55 (Combo): For ultimate versatility, this model includes both pin and pinless functions for $101.99. (Amazon)

Roof-View Drones

A drone allows you to safely inspect steep, slippery, or inaccessible roofs. It demonstrates professionalism and dramatically reduces your personal risk.

  • DJI Mini 2 SE: Weighing under 249g (no FAA registration required for recreational use, but Part 107 is needed for commercial use), it shoots crisp 2.7K video and costs only $279. (DJI Store)
  • Autel EVO Nano+: A step-up option with a superior camera sensor and better obstacle avoidance for $679. It's pricier but a more future-proof investment. (Autel Robotics)

Starter Tip: Don't think of hardware as a one-time hit. Amortize the cost in your bookkeeping. The DJI Mini 2 SE, spread over 24 months, comes out to just ≈$12/month.


Optional Utilities

  • Cloud Storage: A Google One 100 GB plan is $2.99/month. It automatically backs up all your inspection photos from your phone, giving you peace of mind.
  • e-Sign & Forms: Until your volume grows, use the free tiers of services like Jotform or DocuSign’s starter pack, which includes five free envelopes per month.

Sample Lean Budget (<$200/Month)

Here is how it all comes together in a lean, powerful, and affordable monthly stack.

Line-ItemMonthly Cost
Square Appointments (Solo Plan)$0
Tap Inspect (Unlimited Plan)$90
Moisture Meter (Klein ET140 amortized over 24 mo)$2
DJI Mini 2 SE (Amortized over 24 mo)$12
Google One 100 GB Cloud Storage$3
Total Monthly Cost$107

Even if you swapped Tap Inspect for the slightly more expensive Spectora (99/mo),yoursubtotalwouldonlyriseto99/mo), your subtotal would only rise to **114**—still leaving you with plenty of room under the $200 ceiling.


Your Action Checklist

  1. Download Square Appointments and connect it to your business bank account to start taking bookings today.
  2. Grab a ~$50 pinless moisture meter. It’s an essential tool with no calibration headaches.
  3. Order the DJI Mini 2 SE. Practice flying patterns over an empty parking lot to build your confidence before your first real job.
  4. Start your free trial with Tap Inspect, Spectora, or HomeGauge. Import photos from a practice inspection to test the workflow and see which one you like best.
  5. Review your costs every quarter. Only upgrade to a more expensive tool or plan when you can clearly see how its capabilities will pay for themselves in time saved or services sold.

A disciplined tech stack is about maximizing professionalism while keeping overhead lean. Follow the plan above, and you’ll look enterprise-ready without spending enterprise money.

BeFreed.ai — Learning, Your Way, in Minutes

· 4 min read
Richard Thaler
Richard Thaler
Marketing Manager

At Tenspect, we’re obsessed with saving time and sharpening expertise. Our software cuts the busywork out of inspections, and we’re always on the lookout for other tools that share our passion for efficiency and deep knowledge. That’s why when we came across BeFreed.ai, its promise to help you “learn anything, joyfully” immediately caught our eye. For professionals who are constantly on the move, the ability to brush up on building-science fundamentals or squeeze in some self-improvement during the drive between sites is a game-changer.

What Makes BeFreed.ai Different

In a sea of learning apps, BeFreed.ai stands out by transforming dense information into digestible formats that adapt to your needs and preferences. It’s built for the real world, where you might have ten minutes to read while waiting for a client, but thirty minutes of driving time for an audio lesson.

Here’s what makes it a standout tool:

  • Multiple formats, zero friction — The app takes content from books, podcasts, and videos and lets you choose how you want to learn it. You can opt for flashcards for quick recall, concise text summaries for a quick overview, in-depth articles for a deeper dive, or an audio-podcast mode for hands-free learning. The ability to switch between these formats on the fly means your learning can adapt to your changing schedule.

  • Adaptive recommendations — BeFreed.ai doesn’t just offer a library; it offers a personalized learning journey. The platform pays attention to your pace, the topics you engage with, and your preferred formats. It then surfaces what it thinks you’ll find interesting next, creating a feed that genuinely gets smarter and more attuned to you over time. It even identifies your unique "Learning MBTI" to refine its suggestions.

  • “Chat as you learn” — Ever been listening to a podcast and wished you could ask a clarifying question? BeFreed.ai has a built-in chatbot that allows you to do just that. While you’re reading or listening, you can ask for more details or a simpler explanation, eliminating the need to pause and take notes.

  • Community proof — With a community of over 40,000 learners, it's clear that BeFreed.ai is resonating with a wide audience of curious minds. This strong user base suggests the app is more than just a niche experiment and is effectively meeting a real need.

  • Mission-driven team — Based in San Francisco, the small team behind BeFreed.ai is on a mission to make learning feel “as natural as a conversation with a friend.” Their focus is on the human side of AI, aiming to make people smarter and more capable in an increasingly automated world.

How Inspectors Might Use It

The practical applications for home inspectors are immediately apparent:

  • Code-update quick scans — Need to get up to speed on the latest edition of the International Residential Code (IRC) or a manufacturer's installation manual? You can get a summary of the key changes in just ten minutes before your next appointment.

  • Soft-skill refreshers — The daily drive can become productive learning time. You can listen to a podcast summary on effective communication to keep your client explanation skills sharp and professional.

  • Business growth reading list — Ambitious business books like Never Split the Difference can be turned into bite-sized flashcards that you can review in the moments between inspections, helping you absorb key concepts without having to carve out hours for reading.

First Impressions from Our Team

We had a few of our team members give BeFreed.ai a try, and the feedback was overwhelmingly positive:

“The podcast mode is ideal for back-to-back inspection days—ears busy, hands free.”

“Flashcards let me revisit key numbers (clearances, span tables) without digging through my binder.”

Try It Yourself

If the idea of streamlined learning sounds as appealing to you as streamlined inspections, BeFreed.ai is free to start on both iOS and Android. Give it a spin and see how it fits into your workflow. We’re curious to hear what you think!


Questions or feedback? Drop us a note in the comments or reach out at [email protected].

2025’s New Photo-Proof Rules Are Reshaping Rental Inspections

· 5 min read
Richard Thaler
Richard Thaler
Marketing Manager

A new piece of legislation in Sacramento is about to fundamentally change the game for every inspector who services rental properties in California. The California Security-Deposit Act (AB 2801) just rewrote the protocol for rental turnovers, and its ripple effects are creating a powerful new mandate for photo-centric inspections. The age of the text-only condition report is over; the era of "pics or it didn't happen" has officially begun.

What the Law Now Demands

2025-07-07-pics-or-it-didnt-happen-2025s-new-photo-proof-rules-are-reshaping-rental-inspections

Effective this year, the law establishes a mandatory "photo trilogy" for any landlord who intends to make deductions from a tenant's security deposit. This isn't a suggestion; it's a strict, time-sensitive requirement.

  • Effective April 1, 2025 - The Move-Out Pass: Landlords must capture time-stamped images or video of the rental unit's condition immediately after the tenant vacates and before any cleaning or repairs are performed.
  • Effective July 1, 2025 - The Move-In Pass: For all new leases starting on or after this date, a matching set of photos that documents the property's "day-one" condition is also mandatory.
  • The After-Repair Pass: Once all cleaning and repairs are finished, a third and final set of photos must be taken to document the completed work. This set must be shared with the departing tenant along with the final deposit accounting.

The consequences for non-compliance are severe. If a landlord fails to produce any one of these three photo sets, their legal right to make deductions from the security deposit can be completely invalidated. As noted by the California Apartment Association (CAA), this failure also opens the door to potential civil penalties.

Why Inspectors Suddenly Matter Even More

This new legal framework, while aimed at landlords, creates a massive opportunity for professional inspectors. Landlords now have a compelling, risk-averse reason to hire an expert third party to handle this critical documentation.

  • A Powerful Liability Shield: For years, inspectors have known that accurate photos backstop every written note. Now, that photo proof is a landlord's primary defense against costly "you broke it" disputes. A professionally managed photo trail is an invaluable asset in any potential conflict.
  • A Bigger Service Ticket: This is a brand-new, legally mandated service that landlords desperately need. A standalone “Photo Compliance Package” can easily be billed as a 100100–200 add-on for every turnover inspection you perform.
  • A Catalyst for Digital Workflows: Many property owners have been slow to adopt modern reporting tools. AB 2801 changes that overnight. They now have a critical need for an app-based audit trail that can attach dozens of time-stamped images to a clean, shareable PDF in minutes—the exact service you can provide.

App Workflows Built for the New Rules

Fortunately, the inspection software market is already equipped to handle these new demands. Several platforms are perfectly positioned to make photo compliance a seamless part of your workflow:

  • zInspector: Offers guided templates specifically for rental turnovers, with an in-app camera that automatically time-stamps every shot and provides instant PDF export.
  • RentCheck: Features a unique workflow that allows residents to capture the required move-in photos themselves, which are then routed to you for professional review and sign-off.
  • HappyCo / Buildium Suite: For inspectors working with larger multifamily owners, this integrated suite allows photos, work orders, and deposit information to be synced across maintenance and management teams, keeping everyone on the same page.

These tools embed the required photo sets directly into your standard property condition report, keeping your clients audit-ready without creating administrative headaches for you.

Quick Compliance Checklist for Inspectors

To align your services with AB 2801, follow this simple checklist:

  1. Update Your Template: Modify your standard rental inspection template to include sections for the three mandatory photo passes: Move-In, Move-Out (Pre-Repair), and Post-Repair.
  2. Insist on Time-Stamps: This is non-negotiable. While most inspection apps add them automatically, a standard phone camera does not by default. Make sure your process guarantees a time-stamp on every image.
  3. Store Originals for Four Years: The statute requires "reasonable retention" of records. A secure cloud backup of the original, high-resolution photos meets this test and protects both you and your client.
  4. Ensure Proper Delivery: Remember that your client, the landlord, is legally required to deliver these photos to the tenant. Hand off the complete photo package with your final report.
  5. Note the Scope in Your Agreement: Update your pre-inspection agreement to clarify that the "Photo Compliance Package" is a specific, billable add-on, not a freebie included in a basic inspection.

The Takeaway

Security-deposit disputes in California just became a camera game. With the April and July 2025 deadlines now here, every rental turnover requires a photo trilogy to be compliant. Other states are watching this experiment closely, and it’s likely that similar photo-proof laws will spread.

The move is clear: integrate comprehensive, time-stamped image capture into your inspection flow now. Do it before landlords start calling you and asking why your report has plenty of words, but no proof.

Infrared for All: How $199 Clip-Ons Turned Thermal Scans into 2025’s Hottest Home-Inspection Upsell

· 4 min read
Adrian Boria
Adrian Boria
Certified Home Inspector

The cost curve on thermal imaging just fell off a cliff. A decade ago, a professional-grade thermal camera like the FLIR B40 would have set a home inspector back a staggering 4,995.Itwaspowerfultechnology,butthepricekeptitanicheserviceformost.Today,youcansnapaSeekThermalCompactcamerawitha200x150resolutionontoanysmartphoneforabout4,995. It was powerful technology, but the price kept it a niche service for most. Today, you can snap a **Seek Thermal Compact** camera with a 200 x 150 resolution onto any smartphone for about 199.

That single, dramatic price swing explains a fundamental shift in our industry. It’s why clients are no longer surprised by a thermal imaging upsell—they’re starting to ask, “You did run the infrared sweep… right?”

2025-07-06-infrared-for-all-how-199-clip-ons-turned-thermal-scans

What the New Economics Look Like

This isn't just an incremental improvement; it's a complete change in the financial equation for inspectors. The hardware capital expenditure has plummeted from four-figure handheld units to sub-300cliponaccessories.Thishasmadetheservicebothprofitableandeasytooffer.Inspectorsareroutinelycharging300 clip-on accessories. This has made the service both profitable and easy to offer. Inspectors are routinely charging **150 or more** to add a thermal pass to a standard inspection, a process that typically adds only 30-60 minutes to their on-site time.

The payback window is almost immediate. For a $200 camera, just two or three add-on jobs mean you’ve broken even. Everything after that is pure margin. This new reality is why industry chatter in 2025 pins thermal imaging and drones as the two key technologies "leveling up" the trade, with a growing number of inspectors wielding pocket thermography to spot hidden moisture and energy loss.

What an IR Pass Actually Reveals

While the price has become accessible, the diagnostic power of infrared remains as potent as ever. A thermal scan provides clear, visual evidence of problems that are otherwise invisible. According to InterNACHI’s foundational thermography primers for inspectors, these defects fall into three main families:

  • Moisture Intrusion: Thermal cameras excel at detecting the subtle temperature differences caused by moisture behind drywall, under roofing materials, or beneath flooring—long before visible mold or staining appears.
  • Energy Loss: Missing or slumped insulation, poorly sealed windows, and other thermal bridges that bleed expensive conditioned air show up as dramatic cold or hot spots, providing a clear roadmap for energy efficiency improvements.
  • Electrical Hazards: Overheating breakers, failing wiring splices, and stressed HVAC motors glow brightly in the infrared spectrum, flagging critical fire hazards before they lead to catastrophic failure.

Why Buyers (and Agents) Say “Yes”

The value proposition for a thermal scan is incredibly easy for clients to understand, which is why it's such a successful upsell.

First, there’s the peace-of-mind ROI. A 150scanthatcanpotentiallyaverta150 scan that can potentially avert a 5,000 to $10,000 mold remediation or electrical re-wiring bill feels like a bargain. Second, the Instagram-ready visuals are compelling. A rainbow-hued image of a water leak behind a wall makes a hidden risk impossible to ignore, providing powerful leverage for negotiations. Finally, it’s convenient. Since the camera lives in your pocket, there’s no need for a separate visit; the total on-site time barely moves.

Fast-Start Playbook for Inspectors

Ready to add thermal imaging to your services? Here’s a simple playbook to get started correctly.

  1. Gear Up: Purchase a quality clip-on thermal imager and, crucially, a handheld contact moisture meter. Remember, infrared shows temperature differences, not water itself. You must verify any thermal anomalies with a moisture meter.
  2. Document Conditions: For your findings to be valid, context is key. Note the outdoor temperature and the indoor HVAC status in your report. A significant temperature difference (Delta-T) between inside and outside is necessary for clear, meaningful images.
  3. Tag as You Shoot: As you capture each thermal image, use a voice note or your reporting software’s AI copilot to tag it immediately. This allows your software to automatically drop the image and your descriptive text into the correct section of the report.
  4. Educate Your Clients: Be clear in your pre-inspection agreement and verbal summary that thermography is an observational tool. You are there to flag thermal anomalies, not to diagnose the specific cause or prescribe the exact fix.

The Bottom Line for Tenspect Readers

Thermal imaging has officially crossed the same threshold as aerial drones: it’s now a low-cost, high-impact tool with a clear liability-reduction upside. In the competitive 2025 market, ignoring it risks making your service look dated. Adding it, on the other hand, allows you to pocket extra revenue on nearly every job while catching critical defects a flashlight and a keen eye never will.

Next up in the series: energy-code pressure tests and why blower-door scores are inching onto lenders’ checklists. Stay tuned.

Thermal Imaging Goes Mass-Market: How a $199 Clip-On Became Every Client’s Favorite Add-On

· 5 min read
Richard Thaler
Richard Thaler
Marketing Manager

For years, infrared imaging sat in the “someday” column for most home inspectors. It was undeniably powerful technology, but with price tags that could run into the thousands, it remained a luxury for all but the biggest firms. That era is officially over. In 2025, a pocket-sized FLIR ONE Gen 3 thermal camera sells for just $199.99 on Amazon, turning any smartphone into a professional-grade thermal lens.

What was once a high-end differentiator is now an accessible, revenue-generating tool that clients are beginning to expect. Here’s a look at how we got here and why this technology is now a must-have for any modern inspector.

2025-07-07-thermal-imaging-goes-mass-market-how-a-199-clip-on-became-every-clients-favorite-add-on

Why the Floor Just Dropped Out of Pricing

The current accessibility of thermal imaging is the result of a dramatic price collapse a decade in the making. To appreciate the shift, consider the recent past:

  • A decade ago, legacy professional units like the FLIR b40 would have set an inspector back a staggering $4,500.
  • As recently as 2012, even mid-tier “entry-level” thermal cameras still cost around $1,500.

The game changed with the rise of the smartphone accessory market. Companies like FLIR and Seek Thermal, along with innovative newcomers such as InfiRay, maker of the popular P2 Pro (which sells for around $349), leveraged the processing power of our phones to shrink the hardware and the cost. This strategic pivot drove a 5-to-1 price collapse in under five years, moving thermal imaging from a major capital expense to an impulse buy.

What Clients Now Expect the Scan to Reveal

Today’s homebuyers are more informed than ever, and they’ve seen the power of thermal imaging on home improvement shows and social media. When they opt for an infrared scan, they’re looking for tangible evidence of issues that are invisible to the naked eye. The most common revelations include:

  • Moisture & Leaks: Thermal cameras excel at detecting the subtle temperature differences caused by moisture hidden behind drywall, under tile flooring, or in ceiling cavities.
  • Insulation Gaps: Scans quickly reveal missing or improperly installed insulation in walls and attics, as well as thermal bridges that bleed expensive conditioned air to the outside.
  • Electrical Hotspots: Overheating circuits, failing breakers, and faulty wiring splices show up as clear hotspots in an infrared scan, allowing you to flag a potential fire hazard before it fails catastrophically.

When clients see these vivid, rainbow-colored heat maps in your report, the perceived value of your service rises immediately. This makes the 100100–150 upsell for a thermal scan an easy “yes” for most buyers.

Business Upside in Three Quick Bullets

Integrating thermal imaging is more than just a client-pleaser; it’s a smart business move with a clear return on investment.

  1. Higher Ticket Per Inspection: The math is compelling. A 125IRaddononjust40125 IR add-on** on just 40% of your jobs can add over **25,000 to your annual revenue as a solo operator.
  2. Faster Defect Confirmation: Why spend time pulling up baseboards or using invasive methods when you can pinpoint the exact location of a damp patch in minutes? Thermal gets you to the source of the problem faster.
  3. Powerful Marketing Fuel: The images you capture are marketing gold. Social media posts showing a vivid thermal image of a hidden leak draw eyeballs, engagement, and referrals far more effectively than a stock photo ever could.

A Field Workflow That Actually Sticks

Adopting new tech can be disruptive. Here’s a simple workflow to integrate thermal imaging without slowing yourself down:

  • Scan as You Go: Clip the camera onto your phone as you begin the interior inspection. Capture wide, sweeping images of exterior walls, ceilings, windows, and electrical panels.
  • Tag on the Fly: Use voice notes or your AI-powered reporting tool to tag each thermal photo as you take it. This ensures the written narrative and supporting evidence practically write themselves.
  • Verify, Then Report: Remember that an IR camera shows temperature differences, not moisture itself. Always keep a cheap contact-probe moisture meter handy to confirm a thermal anomaly is, in fact, moisture before you alarm a buyer.

Training & Liability Notes

With great power comes great responsibility. Misinterpreting a thermal image can be costly.

  • Get Certified: Invest in a Level I thermography course or, at minimum, a vendor-led micro-certification. Understanding concepts like emissivity and thermal reflection is crucial for accurate readings.
  • Disclose Your Scope: Your pre-inspection agreement should clearly state that IR is an observational, not a diagnostic, tool. Note that readings can be affected by weather, recent occupancy, and thermostat settings.
  • Store Your Data: Keep the original radiometric image files for at least four years. These files contain the full temperature data and can be invaluable in settling any future disputes about "missed" moisture.

The Takeaway for 2025

Infrared imaging is no longer a premium differentiator—it's quickly becoming table stakes for professional home inspectors. At a sub-$300 entry point, the camera pays for itself within a week. It delights clients, strengthens your reports, and protects you from callbacks related to hidden defects. If your toolkit still stops at a flashlight, now is the moment to add a rainbow.

Drones 2.0: From Roof Snapshots to Full-Site Digital Twins

· 5 min read
Adrian Boria
Adrian Boria
Certified Home Inspector

Drones aren’t just for quick roof photos anymore. For years, they’ve been a handy, if limited, tool for getting a quick look at hard-to-reach places. But in 2025, a combination of clearer FAA rules and cheaper, more powerful sensors has turned them into multi-tool platforms that can map an entire property—chimney flue to sewer lateral—in a single, automated flight plan. This is the shift from simple aerial photography to creating comprehensive digital twins of the assets you inspect.

Why the Regulatory Fog Finally Lifted

2025-07-02-drones-2-0-from-roof-snapshots-to-full-site-digital-twins

For professional inspectors, the biggest hurdle to widespread drone adoption has often been regulatory uncertainty. That fog has now cleared, thanks to a few key changes that make compliant flying more straightforward than ever.

First, Remote ID is live and enforced. The FAA’s grace period officially ended on March 16, 2024. Every drone that requires registration must now broadcast its “digital license plate,” constantly transmitting its location and that of its operator. Flying without it isn't just a bad idea; it risks significant fines or the suspension of your pilot certificate.

Second, geofencing is giving way to pilot responsibility. In a significant move, drone giant DJI dropped its hard, automatic no-fly zone locks in January 2025. This change aligns with the new era of Remote ID and shifts the burden of compliance back where it belongs: on the certified operator. Instead of a hard lock, the system now provides "Enhanced Warning Zones," alerting pilots to restricted airspace but leaving the final go/no-go decision in their hands.

For inspectors, the takeaway is simple: the framework for professional drone operation is set. Stay current with your Part 107 recurrent training, ensure your drone's firmware is updated to broadcast Remote ID, and add an inexpensive broadcast module to any legacy aircraft in your fleet.

Beyond Roofs: New Payloads, New Angles

With the rules of the sky clarified, the real revolution is happening on the drone itself. Payloads that were once the exclusive domain of high-end survey companies are now accessible to inspection firms of all sizes.

  • Thermal Cameras for Hidden Defects: Infrared sweeps are no longer a niche upsell. Clients, particularly homebuyers, now expect thermal imaging to be part of a thorough inspection. As firms like Charleston Home Inspection demonstrate, offering drone-based thermal imaging as a standard deliverable has become a key competitive advantage in 2025, spotting hidden moisture intrusion, insulation gaps, and electrical hot spots from a safe distance.

  • LiDAR on Tall and Hollow Structures: Inspecting industrial chimneys or large, complex structures used to require expensive scaffolding or dangerous rope access. Today, compact LiDAR rigs on drones like the DJI M30T or the specialized Flyability Elios 3 can create dimensionally accurate 3-D point clouds in minutes. This data provides an unprecedented level of detail for structural assessments.

  • Sub-Surface Eyes: The new frontier for drones is underground. Cage-style drones, designed for confined spaces, can now fly through manholes as small as 60 cm. Once inside, they can scan up to 900 meters of pipe in a single day—more than double the rate of conventional CCTV crawlers—identifying cracks, blockages, and infiltration points without a human ever entering the space.

  • Higher-Resolution Roof and Gutter Models: Best practices have evolved beyond simple snapshots. Authoritative guides from sources like UAV Coach now recommend a full photogrammetry or LiDAR pass as the standard for properly documenting roofs, flashing, and skylights. This creates a detailed 3D model that leaves no shingle unturned.

What This Means for Your Business

Adopting a multi-sensor drone workflow isn't just about cool tech; it's about the bottom line.

  • Shorter Site Visits: One automated flight can cover the roof, chimney crown, attic vents, solar panels, and even a quick sewer scan, often cutting an hour or more off inspections of large or complex homes.
  • Lower Liability: Keeping your feet on the ground dramatically reduces the risk of falls, the leading cause of injury for inspectors. Furthermore, as insurance providers like InspectorPro note, the photo-rich, indisputable evidence trails created by drones are a powerful defense against "you missed that spot" claims.
  • New Upsells: That same drone can be deployed for new revenue streams. Energy audits using thermal data, construction-phase progress documentation, and post-storm damage surveys for insurance claims all ride on the same airframe you use for standard inspections.
  • Marketing Edge: In a crowded market, a drone is a powerful differentiator. Sellers love the dramatic aerial imagery for their listings, and buyers are increasingly impressed by—and trust—the data-dense, visually compelling reports they receive.

Implementation Checklist

Ready to make the leap? Here’s how to get started.

  1. Verify Your Fleet: Check that every drone you fly has firmware that broadcasts Remote ID.
  2. Refresh Your Credentials: Ensure your Part 107 recurrent test is up to date and you're using current airspace apps like B4UFLY or Aloft.
  3. Start Methodically: Begin by perfecting a roof-only workflow. Once you see the return on investment, add a thermal camera, and then consider LiDAR for specialty commercial or industrial jobs.
  4. Build a Data Policy: Create a standardized process for handling your data. Every photo should be time-stamped and tagged with the relevant defect, ready to drop straight into your reporting software.
  5. Update Your Agreement: Your pre-inspection agreement should clearly state that you use drones for data collection and outline your data storage and privacy policies.

The Bottom Line

With Remote ID now fully in force and powerful multi-sensor payloads available for under $5,000, drones have officially moved from a "nice extra" to a core inspection tool. They trim on-site time, dramatically widen the scope of what you can safely assess, and give clients the visual proof and data density they increasingly demand. If your toolkit still stops at a ladder and a pole cam, 2025 is the year to take flight.

Why AI-Powered Report Writing Is Now Table Stakes for Home Inspectors

· 5 min read
Richard Thaler
Richard Thaler
Marketing Manager

The slowest, most error-prone part of a home inspection has always been turning field notes and photos into a narrative a client can act on. In 2025, that bottleneck is disappearing. Specialized AI “copilots” now assemble a polished PDF in minutes—pushing early adopters ahead on speed, quality, and liability protection. Below is a practical look at what changed, who’s leading the charge, and how any inspector can plug in.

What Just Happened?

2025-07-01-why-ai-powered-report-writing-is-now-table-stakes-for-home-inspectors

The game has fundamentally changed. Purpose-built vision-and-language models have finally landed in inspection apps, transforming the most tedious part of the job. Tenspect’s new Automation Suite, announced today, is a prime example of this leap forward. The AI in their platform now tags each photo, matches it to the correct section of your report template, and drafts defect language that you can either accept with a click or tweak to your liking.

The impact is immediate and dramatic. Early users are reporting up to 75% faster report turnaround times and a staggering 10:1 time-saved-to-cost ratio. This isn't just a marginal improvement; it's a revolution in efficiency.

This technological shift is arriving alongside a regulatory one. Several U.S. states are now tightening photo-documentation laws, requiring before-and-after images for rental turnovers. This makes image-centric AI workflows the default for compliance, rather than a luxury for the tech-savvy.

How the New Workflow Feels

For inspectors on the ground, the new AI-powered workflow feels seamless and intuitive, turning a multi-hour ordeal into a streamlined process.

  • Shoot & Speak: The process is as simple as taking photos or short video clips and dictating a quick note. Apps like InspectMind are built for this, transcribing your voice to text and automatically attaching both the audio and the transcription to the correct area of the report.
  • Instant Defect Suggestions: This is where the magic happens. The AI analyzes your images and provides labels like “Step-crack in masonry,” or “Double-tap breaker.” It then proposes plain-English explanations of the issue along with recommended actions, all based on industry best practices.
  • One-Click Polish: Once you’ve reviewed the AI’s suggestions and made any necessary edits, you simply hit “Generate PDF.” Your branded cover pages, legal disclaimers, and summary pages are all dropped in automatically, creating a professional, client-ready report in moments.

Who’s Leading and What They Offer

A new class of software companies is at the forefront of this change, each with a slightly different focus:

  • Tenspect: Offers a complete solution with robust photo tagging, natural-language narrative generation, and a library of cloud-based templates ideal for multifamily, student housing, and commercial assets.
  • Inspector Toolbelt: Features an AI Assistant that excels at turning your shorthand comments into full, professional explanations. It also adapts its recommendations to local building codes, adding a crucial layer of precision.
  • NeuralSpect: A lightweight, cloud-based platform perfect for solo operators. Its focus is on quick mobile capture and instant report sharing, making it incredibly agile.
  • InspectMind: A speech-first application that is ideal for situations where you need your hands free, like navigating a crawlspace or walking a roof.

Why It Matters for Your Bottom Line

Adopting an AI copilot has a direct and positive impact on your business's profitability and resilience.

  • More Inspections Per Day: When you can cut a two-hour write-up down to twenty minutes, you can realistically fit an extra appointment into every route, significantly boosting your earning potential.
  • Cleaner Liability Trail: The consistent, standardized phrasing and automatic photo and date stamps create a robust and defensible record of your findings, which can be invaluable if a dispute arises.
  • Client Experience Upgrades: Delivering a clear, visually rich report on the same day as the inspection is a powerful differentiator. It wins referrals and sets you apart from competitors who are still emailing Word documents the next morning.
  • Future-Proofing Your Business: The same AI workflow is being expanded to include ancillary services. Add-ons for energy efficiency, radon testing, and more can be seamlessly integrated, allowing you to upsell new services without adding administrative headaches.

Implementation Tips

Making the switch is straightforward if you approach it strategically.

  • Keep Your Voice: To ensure the reports still sound like you, train the AI model by feeding it five to ten of your past reports. The system will learn your style and phrasing.
  • Start with One Template: Begin by piloting the AI on a standard single-family home template. Once you're comfortable with the workflow, you can roll it out across your specialty inspections.
  • Review Everything—At First: Treat your new AI text generator as a junior assistant. It’s incredibly helpful, but it’s still learning your specific standards. Review its output carefully in the beginning.
  • Document the Change: Update your pre-inspection agreement to inform clients that you are using automation and to clarify your photo capture policies.

The Takeaway

A year ago, AI report writing looked like a novelty. After today’s product releases—and with regulators demanding tighter documentation—it’s quickly becoming the minimum bar for professional practice. Adopting an AI-enabled workflow now isn’t just about shaving minutes off your day; it’s about staying competitive, compliant, and client-friendly in a market that’s moving faster than ever.

Tenspect.com will continue tracking the tools and tactics reshaping the inspection trade. Up next: drones with LiDAR and why thermal imaging is suddenly a baseline upsell. Stay tuned.